Tips

Tips

Best Edge Types for Glass Table Tops

Nov 27, 2025


Best Edge Types for Glass Table Tops

Best Edge Types for Glass Table Tops

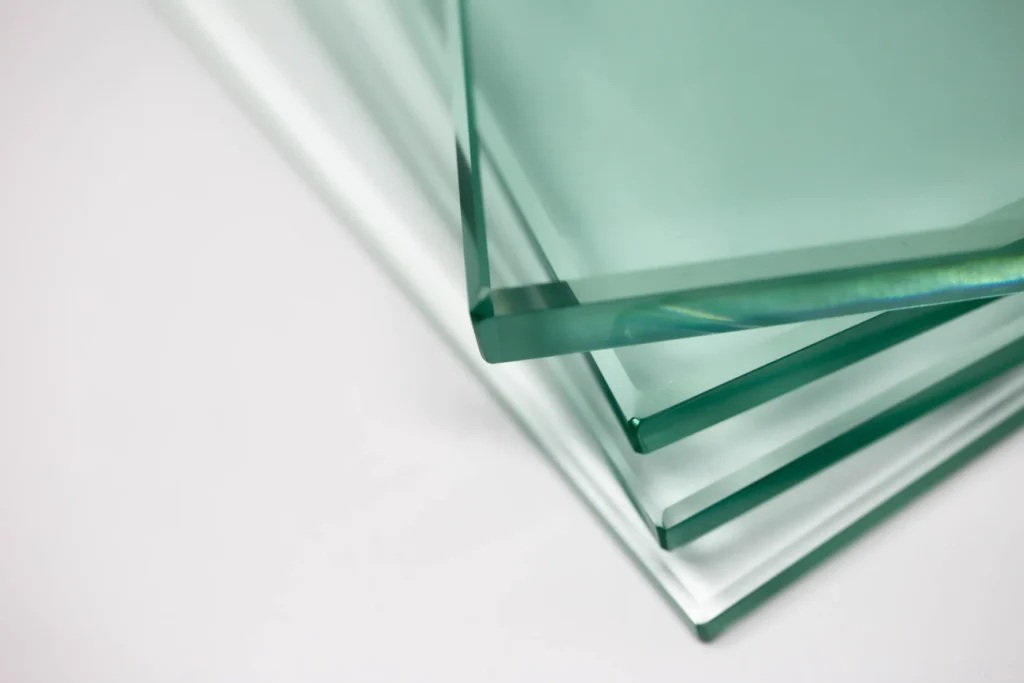
Choosing the right edge finish for a glass table top is just as important as selecting the correct thickness, size, or shape. The edge profile affects not only the look and feel of the table, but also its safety, durability, and suitability for specific home environments. Whether you’re upgrading a dining table, creating a modern desk surface, or protecting a wooden table with custom glass, understanding your edge options will help you make a confident and informed decision.

This guide explains the most popular edge types for glass table tops, their pros and cons, when to use each style, and safety considerations under UK and EU standards.

Why Edge Type Matters

The edge of a glass table top influences:

  • Safety – Smooth, treated edges reduce the risk of cuts and chips.
  • Durability – Proper finishing prevents micro-fractures that can weaken the glass.
  • Design aesthetics – The edge finish plays a major role in the style of the table.
  • Practical use – Sharp or decorative edges may not be ideal for busy households.

For guidance on selecting glass thickness or customisation options, you can learn more here.

Most Popular Edge Types for Glass Table Tops

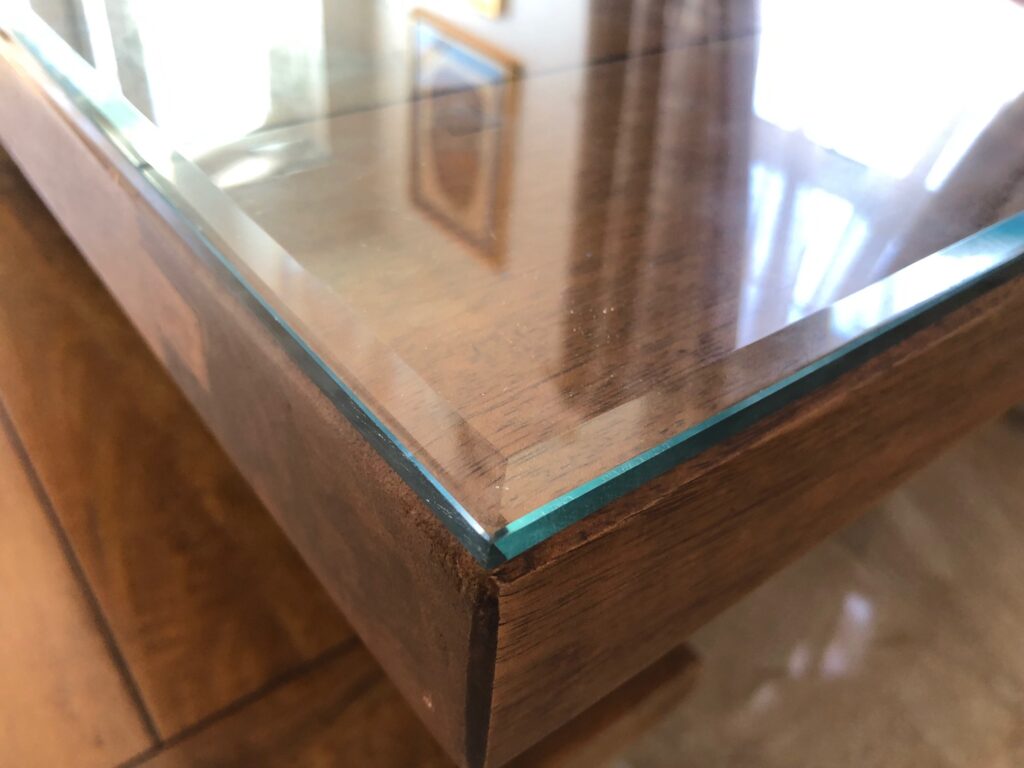
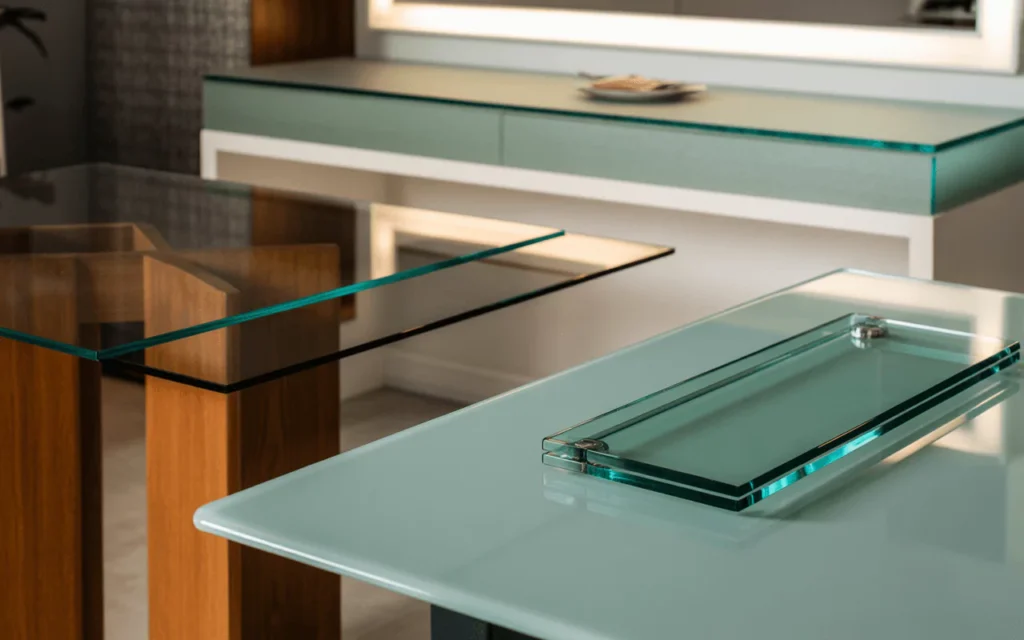
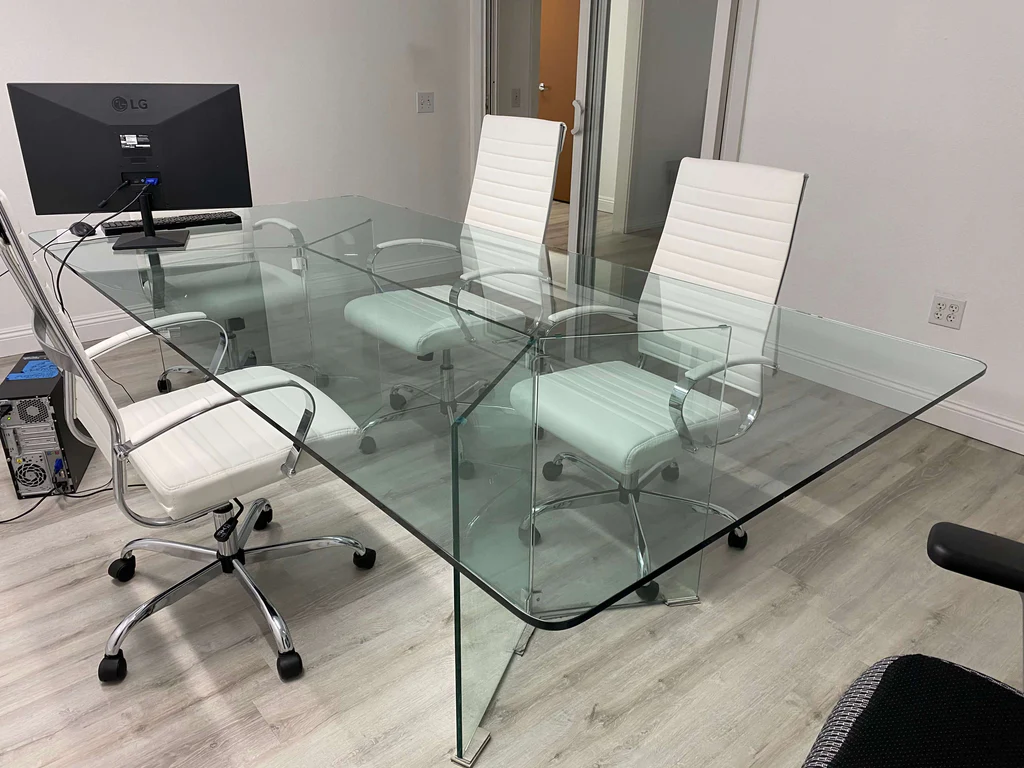
1. Flat Polished Edge

The flat polished edge (also called “flat grind” or “flat edge”) is one of the most common choices for modern homes. The glass is cut, ground to a smooth flat surface, and then polished to a glossy finish.

Best For:

  • Dining tables
  • Desks
  • Minimalist interior designs

Advantages:

  • Smooth, safe, and modern appearance
  • Highly durable and resistant to chipping
  • Easy to clean and maintain

Drawbacks:

  • Simple look may be too minimal for decorative furniture

2. Bevelled Edge

A bevelled edge features an angled cut—typically between 10 and 45 degrees—before transitioning to a flat surface. This creates a decorative, light-reflecting edge.

Best For:

  • Accent tables
  • Entryway furniture
  • Traditional or elegant interiors

Advantages:

  • Visually striking and elegant
  • Reflects light beautifully
  • Adds decorative detail without overwhelming design

Drawbacks:

  • More expensive due to extra craftsmanship
  • Edges can be thinner at the bevel, making them more delicate

3. Pencil Polished Edge

This rounded edge has a smooth, semi-circular finish resembling the curve of a pencil. It offers a softer look and reduces sharpness.

Best For:

  • Homes with children or pets
  • Rounded or oval table tops
  • Everyday dining tables

Advantages:

  • Safer than many other profiles
  • Attractive for curved shapes
  • Feels comfortable to the touch

Drawbacks:

  • Less decorative than bevelled edges
  • Modern but not highly premium in appearance

4. Ogee Edge

The ogee edge is a decorative, sculpted profile featuring an S-shaped curve. It’s more common in high-end furniture and classical interior styles.

Best For:

  • Luxury dining tables
  • Traditional interiors
  • Statement furniture pieces

Advantages:

  • Delivers a premium, artistic look
  • Ideal for antique-style tables

Drawbacks:

  • Most expensive edge type
  • Less suitable for modern or minimalist spaces
  • Harder to clean due to curved grooves

5. Seamed Edge

A seamed edge is simply sanded to remove sharpness but not fully polished. It provides basic safety for glass placed inside frames or structures where edges are not visible.

Best For:

  • Glass that will be inset into a frame
  • Supporting glass shelves
  • Workshop or commercial applications

Advantages:

  • Low cost
  • Provides basic safety

Drawbacks:

  • Not suitable for exposed table top edges
  • Not decorative

Safety Standards and Regulations

In the UK and EU, safety regulations require certain types of glass to be used in domestic furniture to reduce the risk of injury. The most relevant standards include:

  • EN 12150 – European standard for thermally toughened safety glass.
  • EN 14449 – Standard for laminated safety glass.
  • BS 6262 – UK standard covering glazing in buildings, including safety glass requirements.

According to the Glass and Glazing Federation, table tops in homes should be made using toughened or laminated safety glass to minimise risk of injury. For detailed technical information on safety glass behaviour, see guidance from Pilkington’s safety and security glass resources. Additionally, the UK Government provides regulations on safety glazing in building environments, accessible through the Approved Document K.

How to Choose the Best Edge Type

1. Consider Safety First

If you have young children or pets, pencil polished or flat polished edges offer safer handling. Avoid sharp bevels or delicate sculpted edges.

2. Match the Style of the Furniture

  • Modern homes: Flat polished or pencil polish
  • Traditional or luxury interiors: Bevelled or ogee edges
  • Minimalist spaces: Flat polished

3. Think About Table Shape

For round or oval tables, pencil polished edges follow the curve more naturally. For rectangular tops, flat polished or bevelled edges are most popular.

4. Evaluate Maintenance Needs

Simpler edges like flat polished are much easier to clean than decorative ogee or deep bevels.

Conclusion

The edge type you choose has a significant impact on safety, appearance, and usability. Whether you prefer the sleek minimalism of a flat polished edge, the elegance of a bevel, or the safety of a pencil polish, selecting the right edge enhances your table’s durability and overall design. For homeowners looking for bespoke solutions, custom glass table tops offer the flexibility to choose the ideal edge profile for any interior.

FAQs

What is the safest edge type for a glass table top?

Pencil polished edges are generally the safest because they offer a rounded surface with no sharp corners.

Is a bevelled edge suitable for dining tables?

Yes, but bevels can be more delicate along the angled portion. For heavy daily use, a flat polished edge may be more durable.

Do all glass table tops need to be toughened?

In most cases, yes. Safety standards recommend toughened or laminated glass for exposed furniture surfaces.

Which edge type looks the most modern?

A flat polished edge provides a clean, contemporary look suitable for most modern interiors.


Tips

How to Protect a Wooden Table with a Custom Glass Table Top

Nov 27, 2025


Protecting Wooden Tables with Custom Glass Table Tops


How to Protect a Wooden Table with a Custom Glass Table Top

Wooden tables are beautiful, timeless pieces, but they can be prone to scratches, stains, and water damage over time. A simple yet effective way to preserve the natural finish of your table while enhancing its elegance is by adding a custom glass table top. In this guide, we explain why glass table tops are ideal for protecting wooden surfaces, how to choose the right glass, and practical installation tips.

Why Use a Glass Table Top on Wood?

Adding a glass table top to a wooden table offers several advantages:

  • Protection: Prevent scratches, water rings, heat damage, and stains from spoiling your wood.
  • Ease of Cleaning: Glass surfaces are non-porous, making them simple to wipe clean without harsh chemicals.
  • Visual Appeal: High-quality glass preserves the beauty of the wood grain while adding a modern, glossy finish.
  • Durability: Tempered or laminated glass provides long-term protection and is less likely to break under normal use.

Choosing the Right Glass Table Top

1. Thickness

The thickness of the glass should correspond to the table size and expected use:

  • Small coffee tables: 6–8 mm tempered glass
  • Medium dining tables: 8–10 mm tempered glass
  • Large tables: 10–12 mm tempered or laminated glass for extra strength

Thicker glass is stronger and more resistant to impact but may be heavier and require sturdier support.

2. Glass Type

For safety and durability, consider:

3. Shape and Custom Fit

Measure your table accurately. A custom glass top should cover the entire tabletop, with a slight overhang if desired. Most professional suppliers offer bespoke glass cutting to the exact dimensions of your wooden table.

Installation Tips for Glass on Wooden Tables

Step 1: Clean the Wooden Surface

Remove dust, oils, or residues to prevent scratches and ensure the glass sits evenly.

Step 2: Use Non-Slip Pads or Bumpers

Place soft rubber or silicone pads between the glass and the wood. This prevents slipping, absorbs shock, and avoids scratches. For more guidance, see RIBA advice on glass in furniture design.

Step 3: Position the Glass Carefully

Lift the glass carefully and place it on the table, aligning edges precisely. Avoid dragging it across the wood to prevent scratches.

Step 4: Secure (Optional)

For tables that may be moved frequently or in households with children, consider small, transparent corner clips to keep the glass in place without damaging the table.

Maintenance Tips for Glass Table Tops

  • Clean regularly with a soft cloth and non-abrasive glass cleaner.
  • Avoid placing very hot pans or sharp objects directly on the glass.
  • Check pads or bumpers periodically to ensure they remain intact and prevent scratching.

Benefits Beyond Protection

Using a glass table top over wood not only protects your furniture but also enhances your interior design:

  • Showcases the wood’s natural grain and colour while providing a glossy, modern finish.
  • Can be paired with decorative underlays, table runners, or lighting effects for visual impact.
  • Provides a hygienic surface for dining or workspace areas.

For those looking to invest in a high-quality custom glass table top for wooden furniture, professional suppliers can provide accurate measurements, tempered or laminated options, and installation guidance. Learn more about choosing a glass table top here.

FAQ

Q1: Will a glass table top scratch my wooden table?

No, if you use non-slip pads or bumpers between the glass and the wood. These act as a protective layer and prevent abrasion.

Q2: Can I use tempered glass for a heavy dining table?

Yes. Tempered glass of 8–12 mm thickness is suitable for most dining tables and offers excellent impact resistance.

Q3: Is laminated glass better than tempered glass for protecting wood?

Laminated glass holds together if cracked, providing extra safety in households with children or pets, while still protecting the wooden surface.

Q4: How do I measure my wooden table for a custom glass top?

Measure length, width, and optionally include a slight overhang. Many suppliers offer professional measurement services for accuracy.

Q5: How do I clean and maintain a glass table top?

Use a soft cloth and non-abrasive glass cleaner, avoid placing extremely hot or sharp objects directly on the glass, and check pads periodically.


Tips

The Pros and Cons of Glass Table Tops in Modern Interior Design

Nov 27, 2025


The Pros and Cons of Glass Table Tops in Modern Interior Design


The Pros and Cons of Glass Table Tops in Modern Interior Design

Glass table tops are a hallmark of contemporary interior design: elegant, transparent, and versatile. But like any material choice, they come with trade‑offs. In this article we examine the advantages and disadvantages of glass table tops — helping homeowners, interior designers, and decorators decide whether glass is right for their space.

Why Glass Table Tops Are Popular

Glass carries a unique set of properties that explain its enduring popularity in modern interior design. Below we outline the main benefits of incorporating glass tops in tables — whether for dining rooms, living rooms, or multifunctional spaces.

Sleek Aesthetics and Versatility

  • Modern, minimalist appearance: Glass tops deliver a sleek, contemporary look — ideal for minimalist, Scandinavian, industrial or modern design schemes. Their clean lines and transparency give an airy, refined touch that often elevates the whole room. Learn more from this EGW article on glass table tops.
  • Works with various materials: Whether paired with wood, metal or stone bases, glass table tops harmonise easily without clashing, offering flexibility to coordinate with other furniture and décor colours. See this guide on glass table top pros and cons for more.
  • Customisable shapes and sizes: Glass table tops can be cut precisely to size — round, oval, rectangular or bespoke shapes — making them suitable for both large dining tables and compact coffee tables. West London Living explains how to choose the right shape.

Space Optimisation & Light Amplification

One of the most compelling benefits of glass is its transparency. Because light passes through and reflects off a glass surface, a space immediately feels brighter and more open.

  • Illusion of more space: In smaller rooms or apartments, glass tables reduce visual clutter and create an impression of openness. Designers often choose them to make compact areas seem bigger and more airy. Read more from HN Magazine.
  • Enhancing light distribution: Particularly in rooms with limited natural light, glass tops help diffuse and reflect whatever light is available — improving ambience and making the interior feel more welcoming. More information from EGW.

Practical Benefits: Maintenance, Cleanliness and Protection

  • Easy to clean and maintain: Unlike wood which may require periodic polishing or treatment, glass can typically be wiped clean with a microfiber cloth and mild glass cleaner. Learn practical tips from Cameo Glass UK.
  • Resistant to stains and liquids: Glass does not absorb liquids the way porous materials like wood do, so accidental spills generally do not leave permanent marks or odours. See more from Cameo Glass UK.
  • Protecting underlying furniture: Glass tops can act as a protective overlay for antique or delicate furniture. The Glass Warehouse guide explains this benefit in detail.
  • Durability when toughened glass is used: Many modern glass tops are made from tempered (toughened) glass, which is significantly stronger than standard glass. Learn more from Blog4Evers.

The Drawbacks of Glass Table Tops

Frequent Cleaning & Visible Smudges

  • Smudges and dust are highly visible: Even a single fingerprint can stand out on a glass surface. Read more about maintenance challenges from Glass Design Malta.
  • Time and effort overhead: Households with children, pets, or frequent guests may find themselves cleaning often. Glassifieds explains the disadvantages.

Fragility and Risk of Damage

  • Risk of cracking or shattering: Heavy impacts, sharp knocks, or drops can crack glass. Non-tempered glass is particularly vulnerable. ArtofZioHome covers risks.
  • Irreversible damage: Once cracked or chipped, glass typically needs full replacement. Blog4Evers discusses this.
  • Safety hazards in households with children or pets: Even tempered glass must be handled carefully. More on tempered glass safety.

Acoustic and Comfort Issues

Practical Limitations

When Glass Table Tops Make Sense — and When They Don’t

  • Good choice if you:
    • Have a small room or apartment and want to make the space feel larger.
    • Prefer a modern, minimalist aesthetic or want to highlight a stylish base.
    • Value easy cleaning — ideal for busy households.
    • Want to protect antique furniture while updating the look.
  • Might reconsider if you:
    • Have young children, pets, or a very active household.
    • Prefer a cosy, warm feel.
    • Dislike frequent cleaning.
    • Often use hot cookware directly on the table.
    • Need furniture that can be repaired easily.

Tips to Maximise the Benefits

  1. Choose tempered glass: Stronger and safer than standard glass.
  2. Use coasters and trivets: Protect from heat and scratches.
  3. Clean with soft cloths: Avoid abrasives to prevent scratches.
  4. Coordinate underside décor: Ensure the base and flooring complement the table.
  5. Manage glare: Position away from direct sunlight or use blinds.
  6. Move carefully: Always lift with assistance to avoid breakage.

Modern Interior Trends

Glass table tops complement minimalism, open-plan living, and multifunctional spaces. They allow other design elements to shine and make compact spaces feel larger. Learn more about choosing a glass table top here.

Conclusion

Glass table tops offer elegance, light, and flexibility, but require thoughtful handling and regular cleaning. When chosen wisely, they are one of the most stylish and practical choices for contemporary interiors.

FAQ

Q: Are glass table tops safe for children and pets?

A: Tempered glass is stronger and shatters safely, but supervision and rounded edges are recommended. Learn more from Blog4Evers.

Q: Will glass make my room look smaller?

A: No — its transparency creates an illusion of more space. West London Living explains.

Q: How can I prevent scratches or damage?

A: Use coasters, placemats, and trivets, and avoid sliding heavy items across the surface.

Q: Is glass more hygienic than wood?

A: Yes — glass is non-porous and easy to clean. Cameo Glass UK provides details.

Q: Does glass require more maintenance than wood?

A: Yes — fingerprints and dust show more easily on glass. Glassifieds discusses this.


DIY Guide

Tempered vs Annealed Glass Table Tops: Which Is Best and Why?

Nov 27, 2025


Tempered vs Annealed Glass Table Tops: Which Is Best and Why?


Tempered vs Annealed Glass Table Tops: Which Is Best and Why?

Choosing the right type of glass for a table top can make a significant difference in safety, durability and longevity. For many homeowners, the choice comes down to two common options: annealed glass (standard float glass) and tempered (toughened) glass. Though they may look identical at first glance, their properties and performance are very different. In this guide we explore how they differ, when to use each, and which is generally the smarter choice for various home furniture applications.

Understanding the Basics: What Is Annealed Glass and What Is Tempered Glass?

Annealed glass is the standard form of flat glass produced through the float process, where molten glass is cooled slowly and evenly to relieve internal stresses. Learn more about annealed glass.

Tempered (or toughened) glass starts life as annealed glass but is subjected to a specific heat‑treatment and rapid cooling process (quenching). This induces compressive stress on the surfaces and tensile stress in the interior — a molecular rearrangement that dramatically improves its mechanical strength and alters its behaviour under impact. Discover tempered glass properties.

Key Physical Differences

  • Strength: Tempered glass is approximately 4–5 times stronger than annealed glass of the same thickness. Source: Huxley & Co
  • Breakage pattern: Tempered glass breaks into small, relatively blunt granules, reducing the risk of serious injury, whereas annealed glass shatters into large sharp shards. More on breakage patterns
  • Thermal and mechanical resistance: Tempered glass withstands greater impacts, pressure, and thermal stress. Learn about thermal resistance
  • Workability: Annealed glass can be cut, drilled or edge-worked at any time, while tempered glass cannot be modified after processing. Workability comparison
  • Cost: Tempered glass is more expensive due to additional processing. Cost comparison

What This Means for Glass Table Tops

The differences between annealed and tempered glass influence performance, safety and suitability for table tops differently, depending on use.

Advantages of Tempered Glass for Table Tops

  • Safety for daily use: Tempered glass shatters safely into small pieces, reducing injury risk — ideal for homes with children or pets. Safety details
  • Higher impact and load resistance: More robust against knocks or heavy objects. Strength advantages
  • Better thermal tolerance: Can handle hot items better than annealed glass. Thermal properties explained
  • Compliance with safety standards: Often required for furniture in homes and commercial spaces. UK standards reference

Where Annealed Glass May Still Make Sense

Risks and Limitations

Annealed Glass

Tempered Glass

Decision Guide

  1. Usage: Daily, heavy-use tables → tempered; decorative/light-use → annealed.
  2. Safety: Homes with children or pets → tempered glass preferred.
  3. Fabrication needs: Need post-install modifications → annealed.
  4. Budget: Limited → annealed; investment in safety and durability → tempered.

Conclusion & CTA

Tempered glass is generally the safer and more durable option for table tops, especially in busy households. Annealed glass remains suitable for decorative or light-use tables where flexibility is needed. For bespoke, high-quality tempered or annealed glass table tops tailored to your furniture, check out our custom service: custom glass table tops.

FAQ

Is tempered glass always better than annealed for a dining table?

Yes, for safety and durability. Tempered glass is stronger and breaks safely into small granules. Read more.

Can I cut or shape tempered glass table tops after purchase?

No. Tempered glass cannot be modified after tempering. Learn why.

Is annealed glass safe for a glass overlay?

Yes, if fully supported and used lightly. Details on safe use.

Does tempered glass cost much more than annealed?

Yes, due to additional processing. Cost comparison.

Are there optical differences between tempered and annealed glass?

Tempered may show slight roller-wave distortions; annealed is optically clearer. See optical comparison.


Tips

Common Mistakes When Measuring for Gym Mirrors and How to Avoid Them

Nov 25, 2025

Common Mistakes When Measuring for Gym Mirrors and How to Avoid Them

Installing gym mirrors requires precise measurements to ensure a perfect fit, safety, and professional appearance. Even small errors can result in misaligned panels, gaps, or mirrors that don’t fit the wall properly. Whether you’re installing mirrors in a home gym or a commercial fitness space in the UK, avoiding common measurement mistakes is crucial.

For custom-made gym mirrors, Glass Mirror Pro offers tailored solutions with expert guidance to ensure accurate measurements and a flawless installation.


Mistake 1: Not Measuring Multiple Points

Why it happens: Walls are rarely perfectly flat or uniform. Measuring only at one point may lead to a mirror that doesn’t fit correctly.

How to avoid it:

  • Measure the height and width of the wall at three points (left, center, right for height; top, middle, bottom for width).
  • Record the smallest measurement to ensure the mirror fits without gaps.
  • Use a spirit level to check for uneven surfaces.

Mistake 2: Ignoring Obstacles

Why it happens: Wall sockets, radiators, vents, or protruding gym equipment can interfere with mirror placement if not accounted for.

How to avoid it:

  • Mark the position of all obstacles on your wall diagram.
  • Decide whether cut-outs or adjusted panel placement are needed.
  • For safety and aesthetics, leave small margins around equipment.

Mistake 3: Forgetting Safety Backing Requirements

Why it happens: Some installers assume all mirrors are safe without considering activity level.

How to avoid it:

  • For high-traffic areas, commercial gyms, or home gyms with heavy equipment, choose safety-backed or tempered mirrors.
  • Confirm the thickness and safety features with your supplier. (Glass Mirror Pro offers these options.)

Mistake 4: Miscalculating Panel Layout

Why it happens: Large walls often require multiple panels. Without planning, seams may end up in awkward positions.

How to avoid it:

  • Plan panel sizes before ordering.
  • Place seams where they are least visible, such as along equipment lines or away from eye-level areas.
  • Consider modular designs for easier installation and replacement.

Mistake 5: Not Accounting for Adhesive or Fixing Space

Why it happens: Installing mirrors flush against the wall without accounting for adhesive thickness can make the final fit slightly off.

How to avoid it:

  • Leave a small gap (typically 2–5 mm) between the mirror edge and walls or floor.
  • Check adhesive or mounting channel recommendations from the supplier.

Mistake 6: Not Using a Level or Measuring Tools Properly

Why it happens: Relying on rough measurements or eyeballing alignment can result in slanted mirrors.

How to avoid it:

  • Use a tape measure, spirit level, or laser level for precise measurements.
  • Double-check every dimension before placing your order.

Mistake 7: Not Consulting Professionals

Why it happens: DIY installations without expert guidance can lead to mistakes in measurements, safety, or installation methods.

How to avoid it:

  • Consult mirror suppliers or professional installers for guidance.
  • Glass Mirror Pro provides expert advice for UK customers, ensuring measurements are accurate and mirrors are installed safely.

Summary Checklist for Accurate Gym Mirror Measurements

  1. Measure height and width at multiple points.
  2. Mark and account for obstacles.
  3. Choose the correct thickness and safety backing.
  4. Plan panel layout carefully.
  5. Leave space for adhesives or fixings.
  6. Use proper measuring tools and a spirit level.
  7. Consult professionals when unsure.

Conclusion

Avoiding common measurement mistakes is key to achieving a safe, visually appealing, and long-lasting gym mirror installation. By following careful measurement practices and working with expert suppliers like Glass Mirror Pro, you can ensure your mirrors fit perfectly, enhancing both the functionality and aesthetics of your home or commercial gym.

Tips

How to Take Measurements for a Gym Mirror: A Step-by-Step Guide

Nov 25, 2025

Accurate measurements are the foundation of any successful gym mirror installation. Whether you’re planning a home gym, dance studio, or commercial fitness space, precise measurements ensure that your mirror fits perfectly, looks professional, and avoids costly errors.

For custom, made-to-measure mirrors in the UK, Glass Mirror Pro provides expert guidance and bespoke solutions tailored to your space.


Step 1: Gather Your Tools

Before measuring, make sure you have:

  • Tape Measure – Preferably a steel or laser tape for accuracy.
  • Spirit Level – To check wall flatness and ensure horizontal alignment.
  • Pencil – For marking points on the wall.
  • Notebook – To record dimensions and notes.
  • Helper (Optional) – Useful for measuring large walls or handling equipment.

Step 2: Identify the Mirror Location

  • Select the Wall – Choose a wall with enough space and minimal obstructions. Avoid walls with sockets, vents, or windows unless custom cut-outs will be added.
  • Check Wall Condition – Ensure the wall is flat, clean, and strong enough to support the weight of the mirror.

Step 3: Measure the Wall Height

  1. Start from the floor to the ceiling or desired top edge of the mirror.
  2. Measure at multiple points (left, center, right) to account for uneven walls.
  3. Record the shortest measurement for safety, ensuring the mirror will fit.

Tip: Leave a small gap (2–5 cm) from the floor and ceiling for baseboards, expansion, or installation tolerance.


Step 4: Measure the Wall Width

  1. Measure from one side of the wall to the other.
  2. Take measurements at the top, middle, and bottom to check for irregularities.
  3. Record the narrowest width to ensure the mirror fits properly.

Tip: If installing multiple panels, divide the width by the number of panels to determine individual panel sizes.


Step 5: Check for Obstacles

  • Identify sockets, switches, vents, radiators, or protruding equipment.
  • Note their positions for possible cut-outs or adjustments in mirror design.

Tip: Consider safety margins around edges to prevent contact with weights or gym equipment.


Step 6: Decide on Mirror Thickness and Type

  • Home Gyms – 4–6 mm glass is usually sufficient.
  • Commercial Gyms – 6 mm or thicker is recommended for durability.
  • Safety Backing – Safety-backed or tempered glass adds protection, especially in high-traffic areas.

For high-quality options, Glass Mirror Pro can provide made-to-measure mirrors with the appropriate thickness and safety features.


Step 7: Plan Panel Layout (if applicable)

  • Single Panel – Ideal for smaller walls with no obstacles.
  • Multiple Panels – Recommended for large walls; easier to transport and install.
  • Seam Placement – Plan seams where they are least visible or practical, such as above equipment or along floor lines.

Step 8: Record All Measurements Clearly

  • Wall height at left, center, right
  • Wall width at top, middle, bottom
  • Obstacles and cut-out locations
  • Panel layout and desired mirror thickness

Keeping clear notes ensures your custom mirror will fit precisely and avoids costly mistakes during fabrication.


Tips for Accurate Measurement

  1. Double-Check Dimensions – Measure twice to avoid errors.
  2. Level Walls – Use a spirit level to ensure the mirror won’t tilt.
  3. Use a Helper – For large walls, an extra pair of hands improves accuracy.
  4. Consider Expansion – Leave slight gaps for adhesives, mounting clips, or thermal expansion.
  5. Professional Consultation – Suppliers like Glass Mirror Pro can advise on measurements and installation.

Conclusion

Taking accurate measurements is a critical step for installing gym mirrors safely and effectively. By measuring wall height, width, obstacles, and planning panel layouts carefully, you ensure a perfect fit for your home or commercial gym.

For professional, made-to-measure gym mirrors in the UK, Glass Mirror Pro provides bespoke solutions, expert guidance, and high-quality mirrors tailored to your space, making the installation process smooth and reliable.

Tips

How to Install a Gym Mirror: Step-by-Step Guide

Nov 25, 2025

Gym mirrors are an essential part of any fitness space, whether it’s a commercial gym, dance studio, or home workout room. They not only help you monitor form and technique but also make your space feel brighter and more spacious. Installing a gym mirror correctly is crucial for safety, durability, and aesthetics.

For professional, made-to-measure gym mirrors, Glass Mirror Pro offers UK-based solutions that can be customised to fit any wall or space.


Step 1: Prepare Your Wall and Space

Before installation, ensure your wall and space are ready:

  1. Measure the Wall – Accurately measure the height and width of the area where the mirror will go. If you’re installing multiple panels, measure each section separately.
  2. Check Wall Strength – Mirrors are heavy. Ensure the wall can support the weight. Solid walls (brick, concrete) are ideal. Drywall may require additional reinforcement.
  3. Clear the Area – Remove furniture, gym equipment, or obstructions.
  4. Mark the Position – Use a pencil and spirit level to mark the top edge of the mirror for precise alignment.

Step 2: Choose the Right Mirror

  • Glass Thickness: 4–6 mm for home gyms; 6 mm or thicker for commercial installations.
  • Safety Backing: Safety-backed or tempered mirrors are recommended for areas with heavy activity.
  • Edge Finishing: Polished or bevelled edges reduce risk of injury.

For UK customers, Glass Mirror Pro provides custom-cut mirrors with options for thickness, safety backing, and professional edge finishes.


Step 3: Select an Installation Method

There are two common ways to install gym mirrors:

1. Adhesive Installation

  • Recommended For: Smooth, solid walls.
  • Materials Needed: Specialist mirror adhesive, caulking gun, masking tape, and a level.
  • Steps:
    1. Apply adhesive in vertical strips on the wall.
    2. Lift the mirror and press firmly into place.
    3. Use masking tape to hold the mirror while the adhesive cures (typically 24–48 hours).

2. Clip / Channel Installation

  • Recommended For: Large or multiple panels.
  • Materials Needed: Aluminium channels or J-trims, screws, and wall plugs.
  • Steps:
    1. Attach the bottom channel to the wall using screws and plugs.
    2. Place the mirror into the channel.
    3. Secure the top with a matching top channel.

Step 4: Safety Precautions

  • Protective Gear: Wear gloves and eye protection when handling mirrors.
  • Check Alignment: Ensure mirrors are level before adhesive sets.
  • Avoid Excess Pressure: Don’t push too hard, which can crack the glass.
  • Secure Panels: Use multiple fixings for large panels to prevent tipping or movement.

Step 5: Finishing Touches

  1. Clean the Mirror – Use a microfiber cloth and glass cleaner to remove fingerprints or adhesive residue.
  2. Inspect Fixings – Double-check that clips, channels, or adhesive hold securely.
  3. Maintain Safety – Regularly inspect mirrors for loose edges, cracks, or signs of wear.

Tips for a Professional-Looking Installation

  • Use a spirit level and laser level to ensure perfectly straight alignment.
  • Install mirrors at least 5–10 cm above the floor to avoid direct contact with equipment or cleaning tools.
  • For wall-to-wall mirrors, consider modular panels for easier installation and maintenance.
  • Always use safety-backed mirrors in commercial gyms to comply with UK regulations.

Conclusion

Proper installation of gym mirrors is essential for safety, durability, and usability. Whether you’re setting up a home gym or a commercial fitness space, following the right steps ensures your mirrors stay secure and visually appealing.

For high-quality, custom gym mirrors in the UK, Glass Mirror Pro offers made-to-measure solutions, safety-backed options, and professional guidance for installation, making it easier to create the perfect workout environment.

Tips

Smart Home Gym Mirrors: Technology Meets Fitness

Nov 25, 2025

The rise of home gyms has changed the way people train, and smart gym mirrors are at the forefront of this revolution. Unlike traditional mirrors, smart mirrors combine reflective surfaces with interactive technology, offering a fully immersive workout experience in the comfort of your home.

For users who want a traditional mirror alongside smart technology, Glass Mirror Pro offers made-to-measure gym mirrors suitable for home gyms.


What Are Smart Home Gym Mirrors?

Smart mirrors are reflective surfaces integrated with digital screens, sensors, and connectivity features. They allow users to follow live or on-demand workout classes, track metrics, and receive real-time feedback on their form.

Key components include:

  • High-Resolution Display – Shows instructor-led classes, workout routines, or fitness stats.
  • Sensors & Cameras – Detect body movements, posture, and repetitions.
  • Connectivity – Syncs with fitness apps, wearables, and streaming services.

Benefits of Smart Gym Mirrors

1. Real-Time Form Feedback

Smart mirrors allow users to correct posture and alignment during workouts, reducing the risk of injury and improving performance.

2. Interactive Workouts

Users can choose from yoga, pilates, strength training, HIIT, dance, and more. Some mirrors offer AI-generated routines tailored to your fitness level.

3. Space Efficiency

Perfect for small home gyms — one wall-mounted mirror can serve as both reflective surface and interactive trainer.

4. Motivation & Engagement

Seeing real-time metrics such as calories burned, heart rate, or reps completed can boost motivation and consistency.

5. Aesthetic Appeal

When turned off, the mirror functions as a regular reflective surface, maintaining a sleek, minimalist look for your home gym.


Choosing the Right Smart Mirror

When selecting a smart home gym mirror, consider:

  • Size – Large enough for full-body reflection and workout tracking.
  • Sensors – Accuracy matters for correct feedback.
  • Content Library – Ensure access to a variety of workouts suitable for your goals.
  • Connectivity – Wi-Fi and Bluetooth compatibility for apps and wearables.
  • Glass Quality – Tempered or shatterproof glass ensures safety and durability.

Popular Smart Mirror Options in the UK

  • Mirror by Lululemon – Offers live and on-demand classes with instructor guidance.
  • Tonal – Combines strength training with AI feedback.
  • Tempo Studio – Includes AI coaching, weights, and full-body tracking.
  • NordicTrack Vault – A hybrid of smart mirror and storage solution.

For those who prefer a traditional reflective surface alongside a smart system, Glass Mirror Pro provides high-quality made-to-measure mirrors that complement technology setups.


Installation Tips

  1. Placement – Mount at full-body height for accurate reflection.
  2. Lighting – Avoid glare to ensure clear visibility of both reflection and display.
  3. Connectivity – Ensure a strong Wi-Fi connection for uninterrupted streaming.
  4. Wall Strength – Mirrors can be heavy, especially with integrated tech. Ensure your wall can support the weight.
  5. Maintenance – Clean with microfiber cloths and non-abrasive cleaners to protect both glass and sensors.

Conclusion

Smart mirrors are transforming home gyms by combining interactive technology, performance tracking, and motivation in a single reflective surface. They save space, enhance engagement, and offer a more personalized workout experience.

For a traditional gym mirror that complements your smart setup, Glass Mirror Pro offers custom-made, high-quality mirrors designed for home and commercial gyms alike.

Tips

Mirrored Gym Wall Panels: Transforming Your Workout Space

Nov 25, 2025

Mirrored wall panels have become a staple in modern gyms, dance studios, and fitness centers. Unlike standard mirrors, mirrored gym wall panels allow for seamless, full-wall coverage, giving the space a professional look while enhancing functionality. This article explores what mirrored gym wall panels are, their benefits, and tips for choosing the right panels for your home or commercial gym in the UK.

For professional-quality gym mirrors, including full wall panels, Glass Mirror Pro offers bespoke solutions tailored to your space.


What Are Mirrored Gym Wall Panels?

Mirrored gym wall panels are large mirror sheets or modular sections designed to cover significant portions of a wall. They can be installed in sections to create a continuous reflective surface or as single large sheets for a seamless look.

Key features:

  • Seamless Appearance: Multiple panels can be joined to appear as one continuous mirror.
  • Safety Backing: Many panels come with safety or foil backing to prevent shattering.
  • Custom Sizes: Panels can be cut to fit the exact dimensions of your wall.

Benefits of Mirrored Gym Wall Panels

1. Enhance Spatial Awareness

Full-wall mirrors help gym-goers maintain proper form, alignment, and spacing during workouts. This is particularly useful in group fitness classes or dance sessions.

2. Improve Motivation

Seeing your reflection during exercises boosts motivation and encourages better performance.

3. Create the Illusion of a Larger Space

Mirrored panels reflect light and make small gyms appear larger and brighter, creating a more inviting environment.

4. Professional Aesthetic

Continuous wall mirrors provide a polished, professional look suitable for commercial gyms, boutique fitness studios, or high-end home gyms.

5. Flexible Layout Options

  • Modular Panels: Easier to transport and replace if damaged.
  • Single Large Sheets: Minimal seams for an uninterrupted reflection.
  • Custom Shapes: Some studios prefer panels with cut-outs for equipment, vents, or decorative accents.

Materials and Types

  1. Standard Glass Panels
    • Affordable and reflective.
    • May require safety backing for high-traffic areas.
  2. Safety-Backed Mirrors
    • Include a film or foil backing to prevent dangerous shards if broken.
    • Comply with UK safety standards (BS 6206).
  3. Tempered Mirrors
    • Heat-treated for strength.
    • Breaks into small, blunt fragments rather than sharp shards.
  4. Acrylic Panels
    • Lightweight, shatter-resistant, and easy to install.
    • Slightly less clarity than glass but safer for active environments.

Installation Tips

  • Wall Prep: Ensure the wall is flat, clean, and load-bearing.
  • Panel Alignment: Measure precisely to maintain continuous reflection.
  • Fixings: Use specialist adhesives, clips, or aluminium channels for security.
  • Safety: Always opt for safety-backed or tempered panels in high-use areas.
  • Professional Help: Consider professional installation for large commercial walls to avoid accidents.

Where to Get Mirrored Gym Wall Panels in the UK

Some reputable suppliers include:

  • Glass Mirror Pro – Offers made-to-measure mirrored wall panels with safety backing. (glassmirrorpro.com)
  • Commercial Mirrors UK – Specialises in full-wall mirror panels for gyms and dance studios. (commercialmirrors.co.uk)
  • Mirror Installation Ltd – Provides surveying, custom cutting, and professional wall panel installation. (mirrorinstallation.co.uk)

Maintenance Tips

  • Regular Cleaning: Use non-abrasive, ammonia-free glass cleaners.
  • Inspect Panels: Periodically check adhesive or fixings.
  • Avoid Heavy Impacts: Even tempered panels can be damaged if hit with heavy weights.
  • Polished Edges: Reduces risk of injury when cleaning or moving equipment near the mirrors.

Conclusion

Mirrored gym wall panels are an excellent investment for home or commercial gyms. They enhance spatial awareness, motivation, and aesthetics while providing a professional look. For seamless, safe, and custom-fit solutions in the UK, Glass Mirror Pro is a trusted provider for gym wall mirrors, offering bespoke panels that fit your space perfectly.

Tips

How to Order a Custom Gym Mirror

Nov 25, 2025

1. Measure Your Space Accurately

  • Height & Width: Use a tape measure or laser measure to find the exact dimensions of the wall where you want the mirror.
  • Wall Material: Note whether your wall is plasterboard, brick, or timber — this affects mounting.
  • Obstacles: Identify any sockets, vents, or light fixtures. If there are obstacles, you may need cut‑outs.
  • Number of Panels: Decide if you want one large mirror panel or multiple smaller ones.

2. Choose the Right Mirror Specifications

Here are key factors to decide on:

  • Thickness: Common options are 4 mm or 6 mm. For larger mirrors, thicker glass (like 6 mm) is more stable. Chandler Sports+1
  • Backing / Safety:
    • Safety-backed mirrors use a film so glass fragments stay together if they break. Chandler Sports+1
    • Foil-backed or polished edge finishes may be available. A&E Glazing
  • Cut-Outs & Custom Shapes: You can request holes, socket cut-outs, or even radius corners. A&E Glazing
  • Finish: Polished or bevelled edges look cleaner and are safer. Aaran Glass – Glass & Glazing Services
  • Glass Type: Decide between normal mirror glass or safety/toughened glass. For high-use gyms, safety‑backed or toughened glass is often a wise choice. CreoGlass®

3. Get Quotes from Reputable Suppliers

Here are some trusted UK-based suppliers to get started:

  • A&E Glazing — Specialises in made-to-measure gym mirrors. Enter your sizes and cut-out requirements directly on their website. A&E Glazing
  • Chandler Sports — They cut mirrors to your exact dimensions; they ask for width, height, and wall type. Chandler Sports
  • MirrorFit — User-friendly quote tool. They use Pilkington / Saint-Gobain glass, offer 4 mm and 6 mm, and deliver in ~10 working days. MirrorFit+1
  • Aaran Glass — Offers custom gym mirrors with optional safety backing and bespoke cut-outs. Aaran Glass – Glass & Glazing Services
  • Mirror Cut To Size — Fill in an online form to get an instant quote for a custom mirror. Mirror Cut To Size
  • Gym & Dance Mirrors Direct — Their “Easy‑Fit” mirrors come framed in aluminium with safety glass. Gym & Dance Mirrors
  • Mirror Installation UK — If you also want installation done professionally, they survey, quote, and install large gym mirrors. mirrorinstallation.co.uk

4. Place the Order

Once you’ve picked a supplier:

  • Submit your dimensions, glass spec, and any cut-out details.
  • Confirm the quote, including any extras (edge finishing, safety backing, installation cost).
  • Pay a deposit if required — many custom fabricators will ask for part payment before production.

5. Prepare for Delivery & Installation

  • Delivery: Mirrors are fragile. Make sure you (or the installer) have space to receive and unpack.
  • Wall Preparation: Clear the installation area; make sure the wall is clean and strong.
  • Install: Use the method recommended by your supplier — typically high-strength mirror adhesive, or a channel system / clips. mirrorinstallation.co.uk+1
  • Safety Checks: After installation, check that the mirror is firmly fixed and level.

6. Maintenance After Installation

  • Clean with non-abrasive, ammonia-free glass cleaner.
  • Regularly check fixings and backing (if safety‑backed) to ensure they remain secure.
  • Avoid hard impacts. Even if the mirror is safety-backed, a heavy blow can damage it.

Why Consider Glass Mirror Pro

If you want custom gym mirrors tailored to your exact space, Glass Mirror Pro is a strong choice. They specialize in gym mirrors and offer made-to-measure solutions that combine design, safety, and durability. You can check out their gym mirror options here: Glass Mirror Pro – Gym Mirror.


Summary: Ordering Custom Gym Mirrors — Checklist

  1. Measure your wall & note obstacles
  2. Choose thickness, backing, edge finish
  3. Request quotes from 2–3 mirror suppliers
  4. Confirm specifications and place order
  5. Prepare your wall and receive the mirror
  6. Install properly (or use professional install)
  7. Maintain for longevity & safety