Tips

Tips

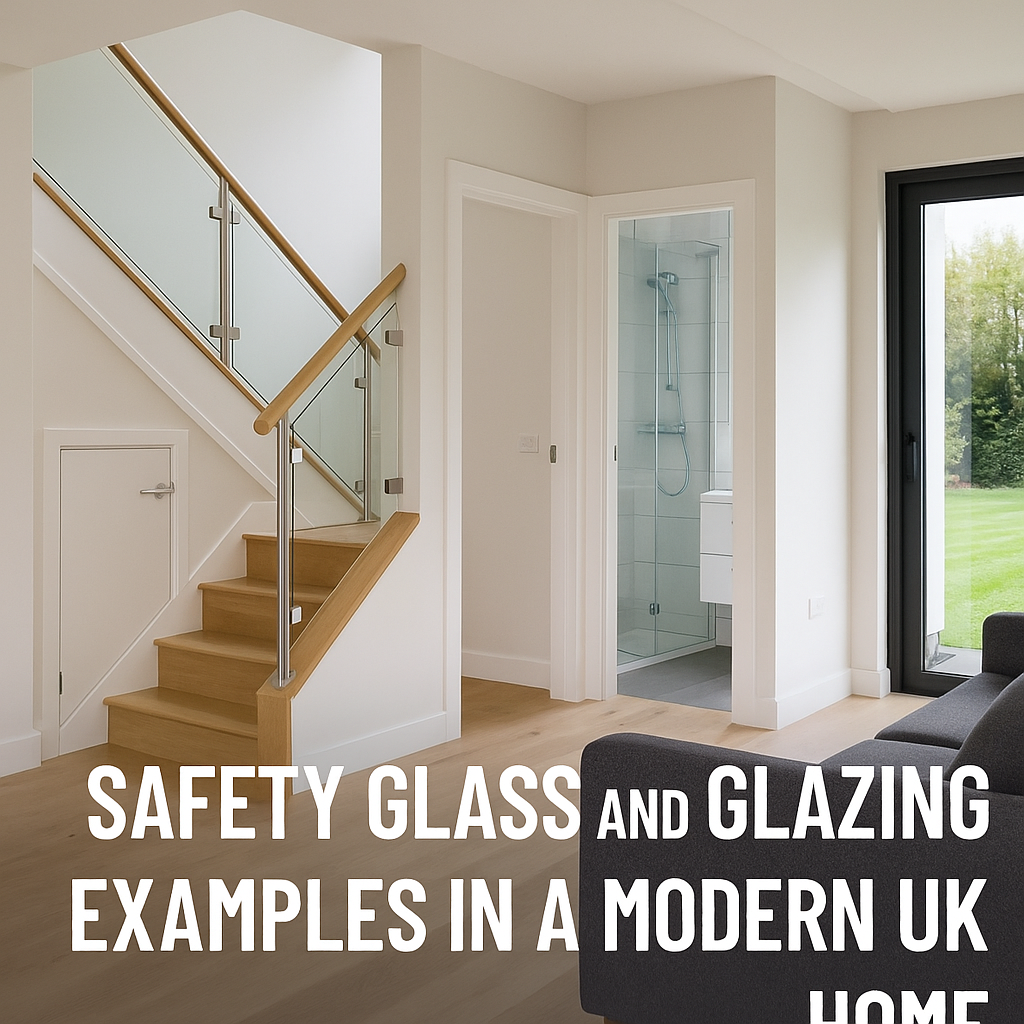
Shower Glass Thickness Guide: 6mm vs 8mm vs 10mm Explained

Sep 20, 2025

Glasshelp Guide · 2025

Read time: ~6–8 mins · Updated: 20 Sep 2025

Deciding the right thickness for your shower glass is more than just durability—it affects safety, aesthetics, cost, and the look of your bathroom overall.
In this updated guide, you’ll see what 6 mm, 8 mm, and 10 mm glass offer, with comparisons, safety norms, and tips to help you choose smartly.

Infographic: Comparison of 6mm, 8mm and 10mm shower glass thickness

Why thickness matters

Thickness impacts a few critical things in glass shower design:

  • Strength & rigidity: thinner glass flexes more; thicker glass maintains shape better under use.
  • Safety: tougher glass reduces risk, especially in large or frameless panels.
  • Appearance & finish: thicker glass feels premium and often looks more substantial.
  • Hardware requirements & cost: thicker glass needs heavier hinges, stronger fixings, more care in installation.

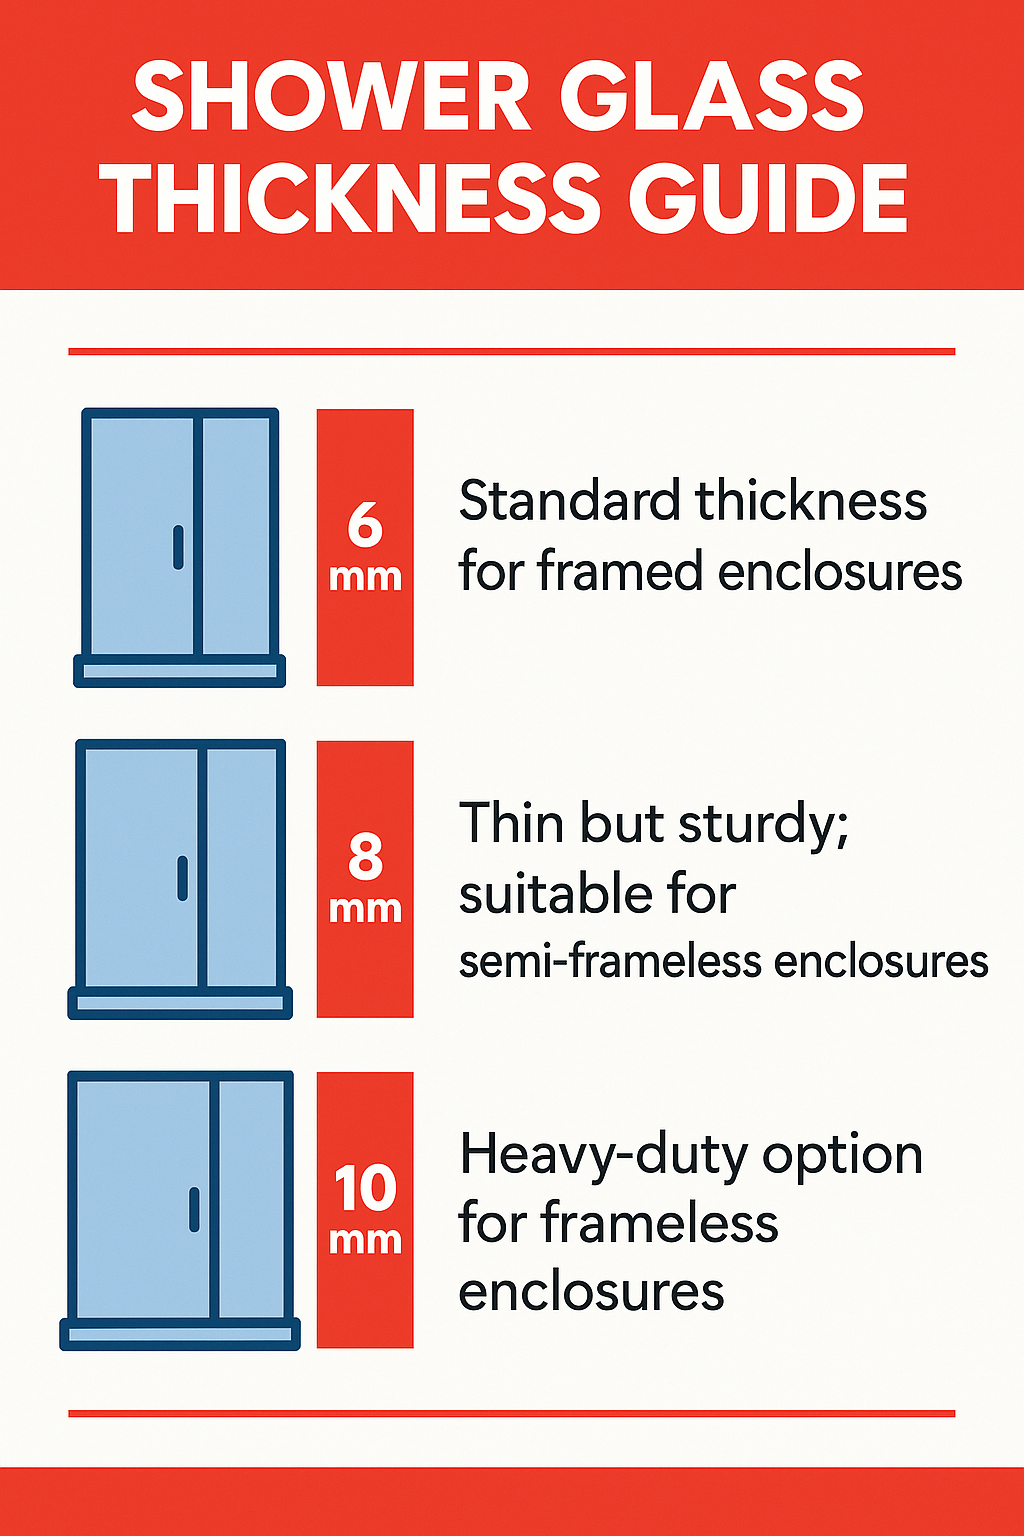
6 mm vs 8 mm vs 10 mm comparison

6 mm Glass

Pros: Lower cost, lighter panels, suitable for framed or smaller screens.

Cons: More flex, less premium feel, limited to smaller spans.

Ideal for: small shower screens, splashbacks, budget-friendly installations.

8 mm Glass

Pros: Balanced rigidity and cost; effective for frameless doors of moderate size.

Cons: Heavier, slightly more expensive, needs good hardware.

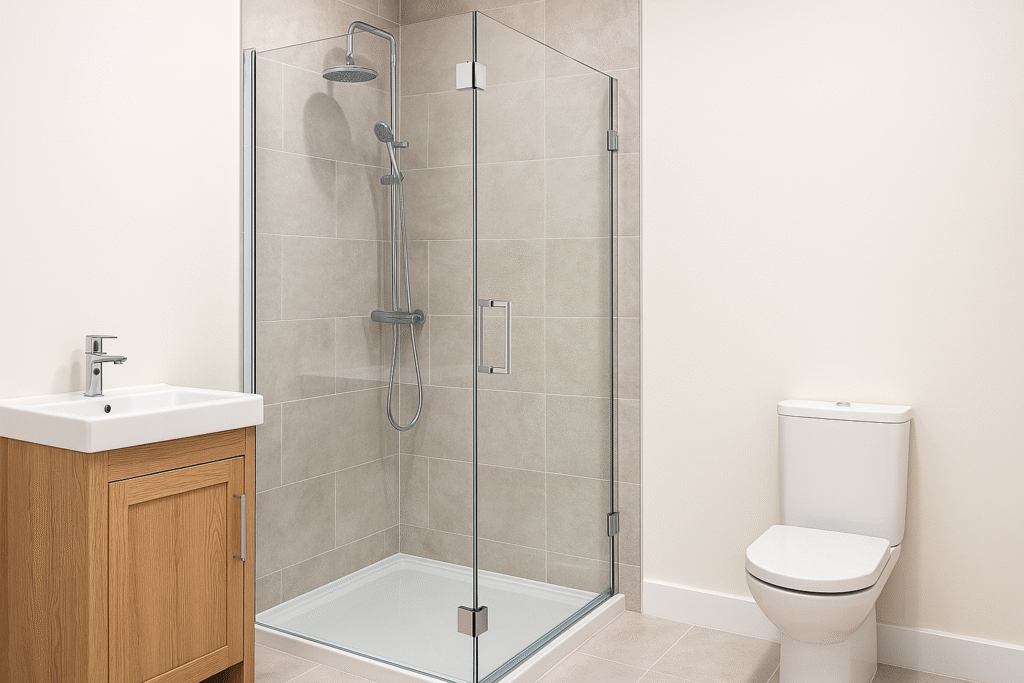
Ideal for: standard frameless shower doors, medium screens, classic wet room panels.

10 mm Glass

Pros: Maximum stiffness, high-end appearance, minimal flex in large panels.

Cons: Major cost, heavier, needs robust supports and hinges.

Ideal for: large walk-in showers, large frameless doors, luxury installations.

Which thickness for your shower setup

  • If your glass width is under ~800 mm or you’re using a framed screen, 6 mm is cost-effective and safe enough.
  • For frameless or semi-frameless screens of moderate width (e.g. ~800-1200 mm), 8 mm gives less flex and better durability.
  • For premium walk-in showers, large panels or doors, go with 10 mm—just ensure your fittings can support the weight.

Installation, cost & safety

  • Check that all fixings, hinges, and hardware are rated for the thickness you choose.
  • Expect higher shipping & handling costs with thicker glass.
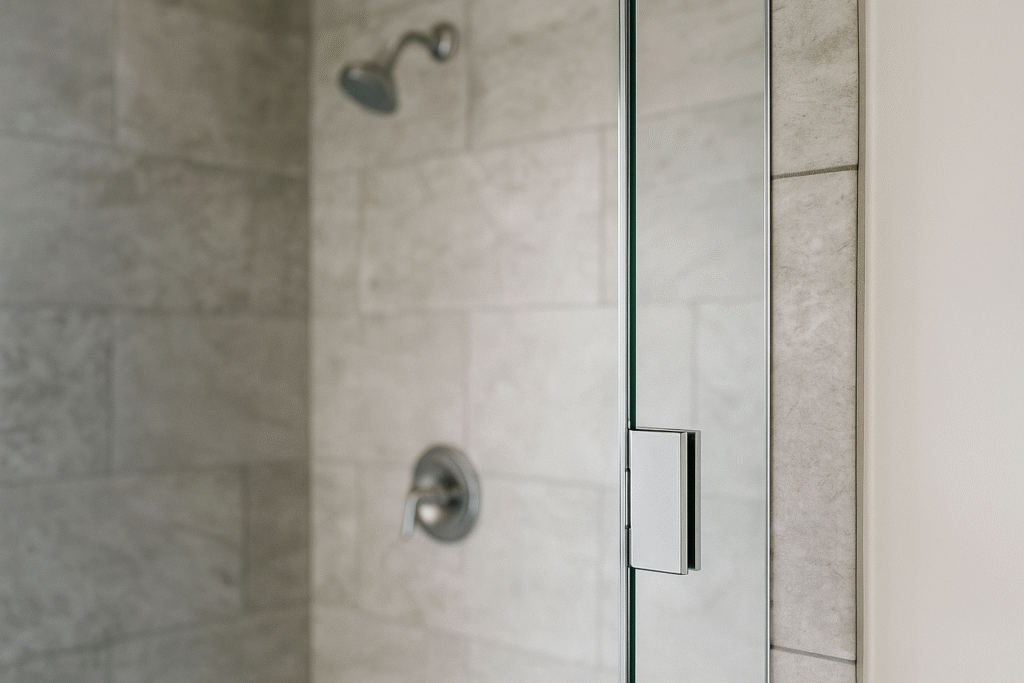
  • Edge finishing: polished or safety-finished edges reduce risk and improve appearance (especially for exposed edges).
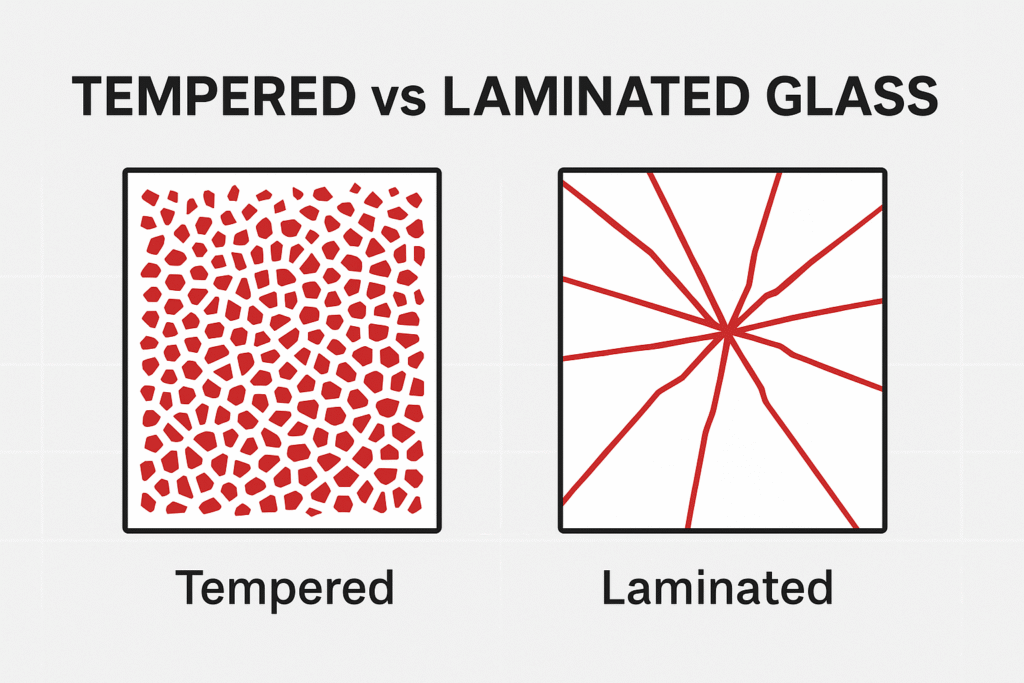
  • Always use toughened safety glass certified to BS EN 12150 and check CE or UKCA marks. :contentReference[oaicite:0]{index=0}
  • Consider spill, water spray, door movement: flex can cause strain, seal wear, leaks if glass is too thin for the span. Thicker glass helps mitigate this.

Safety standards & regulation

Here are some UK rules and expert references to help you stay compliant:

  • According to GlassGuide from ToughGlaze, shower doors are often sold in 6-12 mm thickness, with 8 mm & 10 mm being very common, and all panels required to be certified to BS EN 12150. :contentReference[oaicite:1]{index=1}
  • Building regulations require safety glass for glazing within 800 mm of the floor or within 300 mm of a door’s edge, and in door panels/sidelights lower than 1 500 mm from floor level. :contentReference[oaicite:2]{index=2}
  • Glasstrends uses 10 mm toughened safety glass certified to BS EN 12150 and impact tested to BS EN 12600 for its frameless showers. :contentReference[oaicite:3]{index=3}

Need custom-cut shower glass?


Explore Shower Screens at GlassHelp

High quality glass · Trusted safety standards · Competitive prices

Frequently asked questions

Is 6 mm glass safe enough for shower doors?
For smaller or framed panels, yes—but for frameless or wide doors, 8 mm or above is usually safer and more durable. Many UK manufacturers specify BS EN 12150 toughened glass for safety. :contentReference[oaicite:4]{index=4}


Will 10 mm make a visible difference?
Absolutely for large spans—10 mm gives a more rigid, premium feel with less visual flex. But you pay more and need strong hardware. Examples from Glasstrends and ToughGlaze confirm this. :contentReference[oaicite:5]{index=5}


Does thicker glass require special maintenance?
Not really—just care with edges, seals, hinges, and using non-abrasive cleaners. No special cleaning needed beyond standard care.

Tips

Safety Glass And Glazing Examples In a Modern UK Home

Sep 20, 2025

Expert Advice · 2025

Read time: ~7–9 mins · Updated: 20 Sep 2025

Choosing the right safety glass isn’t just about looks—it’s about keeping your family safe and your project compliant.
This quick, practical guide shows typical UK “critical locations”, when to use toughened vs laminated glass,
and simple steps to measure, order, and install with confidence.

Looking specifically for toughened (tempered) glass? Fast UK delivery and polished edges available:
Tempered Glass — Made to Measure.

Where safety glass is required in UK homes

Use safety glass where impact risk is higher or glazing sits close to doors/floors. Common “critical locations” include:

  • Within and around doors (side panels, glazed doors, door panes)
  • Low-level glazing close to the floor (often up to ~800–1500 mm, context-dependent)
  • Bathrooms and showers (screens, enclosures, splash zones)
  • Balustrades, Juliet balconies, landings, stair edges
  • Internal partitions and room dividers in busy areas

Tip: If in doubt, assume safety glass is needed for low-level or high-traffic locations and request compliance marking on the pane.

Toughened vs laminated — which to choose?

Toughened (Tempered)

Best for: shower screens, doors, shelves, table tops.

Why: Up to ~5× stronger than ordinary glass; breaks into small granules.

Plan ahead: Cannot be cut or drilled after toughening—finalise measurements & hardware first.

Order toughened glass →

Laminated

Best for: balustrades, shopfronts, acoustic or UV-reduction needs.

Why: Two panes bonded with an interlayer; fragments adhere if broken, helping maintain a barrier.

Consider: Heavier; ensure suitable supports and edge protection.

Common thicknesses & edge options

6 mm toughened
Small doors, shelves, screens
8 mm toughened
Shower doors/panels, medium screens
10–12 mm toughened
Large screens, frameless doors, table tops
6.4–10.8 mm laminated
Low-level safety glazing, acoustic/UV control

Edges: arrised (basic smooth), polished (premium clear), bevelled (decorative). For exposed edges, choose polished.

“Measure twice—order once. Precision saves cost, time and frustration.”

How to measure & order correctly

  1. Check squareness. Measure width top/middle/bottom; height left/centre/right. Use the smallest dimension.
  2. Allow clearances. Leave 2–4 mm fitting tolerance (confirm with hardware/seals).
  3. Choose hardware early. Hinges, channels, clamps decide hole sizes/positions for factory processing.
  4. Specify edges & corners. Polished edges for visibility; radius corners where exposed or child-reach.
  5. Compliance marks. Request appropriate safety markings where required.

Installation tips for a neat, safe finish

  • Use setting blocks/gaskets—never rest glass on bare metal or masonry.
  • Match clamps/channels to thickness and load; avoid point-loading corners.
  • For showers: leave expansion gaps; use neutral-cure silicone; fit seals after alignment.
  • Final check: plumb, level, square—tighten hardware before sealing.

Care, cleaning & warranty basics

Use a soft cloth and non-abrasive, ammonia-free cleaner. Squeegee showers after use to reduce limescale. Keep proof of purchase and any compliance labels for your records.

Ready to order toughened glass cut to size?


Start Your Custom Order

Fast UK delivery · Precision cut · Polished edges available

Frequently asked questions

Do I need safety glass next to doors?
Yes—glazing within and around doors is usually a “critical location” and should be safety glass, especially at low level.


Which is safer—toughened or laminated?
Both are safety glass. Toughened is very strong and granulates; laminated retains fragments via its interlayer, helping maintain a barrier.


Can you cut toughened glass after it’s made?
No. All cuts/notches/holes must be specified before toughening.


What thickness for a shower screen?
8–10 mm toughened is typical for frameless doors/panels. Confirm with hardware guidance.


Is laminated good for sound reduction?
Yes. The interlayer improves acoustic performance vs monolithic panes of similar thickness.


How do I protect visible edges?
Specify polished edges; use compatible gaskets/blocks; avoid point loads on corners.

Tips

Replace Yellowed Shower Seals (Leak-Free Finish)

Sep 20, 2025

UK homeowner’s guide. Yellowed or cracked shower door seals cause leaks, squeaks and a tired look. This step-by-step shows you how to choose the correct profiles, measure precisely, remove residue without scratching, and fit new seals for a clean, watertight finish. If you’re comparing glass strength types while upgrading, skim our primer on tempered glass first.

Overview

Most frameless shower doors use push-on or clip-on PVC/TPR seals that grip the glass edge. You’ll typically replace a bottom sweep (to deflect water into the tray) and 1–2 side seals (hinge and latch/meeting edges). Performance depends on a snug grip for your glass thickness (often 8–10 mm), a true “kiss” between the sweep and threshold, and clean, square meeting lines at the latch side.

Project at a glance
Skill: Easy–moderate · Time: 45–90 min · Typical cost: £15–£40 per door (seals)

Seal Profiles (Quick Chooser)

Position Profile What it does
Bottom edge Sweep with single or twin fins Deflects water back into tray; sets “kiss” on threshold
Latch/meeting edge Magnetic pair or H/T profile Closes gap; gentle magnetic draw for tight seal
Hinge side Straight push-fit Stops spray near hinge hardware
Door–fixed panel joint U-channel clip with soft fin Bridges door to side panel on two-panel enclosures

Match by thickness: The “U” grip must suit your glass (6/8/10 mm). Too tight = stress on glass; too loose = slips and leaks.

Tools & Materials

  • Fine saw or heavy scissors · Ruler · Masking tape · Pencil · Spirit level
  • Isopropyl alcohol (IPA) & lint-free cloths · Plastic scraper (old store card works)
  • Replacement seals: bottom sweep + side seal(s) to your thickness
  • Optional: Neutral-cure sanitary silicone (only for channels/frames as per manufacturer)

Measure & Compatibility Checks

  1. Glass thickness: Check manual or measure with calipers (common: 8–10 mm).
  2. Bottom gap: Close the door and measure to the tray/threshold. Choose a sweep whose fin lightly touches without drag.
  3. Latch gap: Measure the meeting gap; for magnetic pairs, ensure profile depth suits your gap so magnets meet flush.
  4. Floor fall: If the floor falls outwards, pick a sweep with a longer or angled fin, or you’ll still get drips.

Remove Old Seals & Residue

  1. Open the door. Starting at one end, pull the old seal straight off the glass edge. If brittle, remove in short sections.
  2. Remove adhesive dots/silicone smears with a plastic scraper. Avoid metal blades on glass edges.
  3. Wipe the glass edge with IPA until squeaky-clean and dry. Inspect hardware gaskets; replace any that are crushed or missing.
Do not use acetoxy (vinegar-smell) silicone on back-painted or mirror finishes. If sealing channels/frames, use neutral-cure silicone.

Fit New Seals (Side & Bottom)

General tip: Warm the seals indoors for 10–15 minutes so they’re pliable and seat evenly.

Side seals (hinge/latch)

  1. Cut the seal 1–2 mm long. Test-fit; trim flush after final seating.
  2. Push the rigid “U” squarely onto the glass so the soft fin just touches the frame or fixed panel (no buckling).
  3. For magnetic pairs, check polarity and height; the magnets should meet neatly down the full length with a gentle draw.

Bottom sweep

  1. Close the door and measure the bottom edge. Cut the sweep square; de-burr the cut end.
  2. Push the sweep fully onto the glass. The fin should kiss the threshold — smooth contact, no scraping.
  3. Test the swing: open/close 5–10 times. If it drags, trim 1–2 mm or swap to a sweep with a shallower/angled fin.

Leak Test & Fine Tuning

  • Run water for 2–3 minutes. Check hinge side, latch line and under the door.
  • Latch drips: Nudge the side seal outward 1–2 mm so the fin sits square.
  • Under-door drips: Raise the sweep slightly or change to a longer/angled fin if the floor falls outward.

Common Mistakes (and Fixes)

  • Wrong thickness: Too-tight “U” grips stress glass; too-loose grips slip. Order for your exact thickness.
  • Fin too long: Drag twists the door and wears quickly. Trim in 1–2 mm steps.
  • Magnet polarity reversed: If strips repel, flip one end-for-end and re-fit.
  • Sealing both sides of a channel: Traps water. Seal only as the hardware instructions specify.

Aftercare & Maintenance

  • Daily: Quick squeegee to prevent mineral lines.
  • Weekly: pH-neutral cleaner on seals and glass; avoid abrasives.
  • 6–12 months: Replace sweeps that stiffen/yellow; check magnet draw and hinge alignment quarterly.

FAQs

Do I need silicone to hold seals on?
No. Most are push/clip-fit. Use silicone only for channels/frames as directed.

Will new seals fix a badly sloped floor?
They help, but if water falls outward you may need an angled fin and/or to correct the threshold.

How do I confirm glass thickness?
Check the manual or measure with calipers. Common sizes are 8–10 mm for frameless doors.

Is laminated better than toughened here?
For shower doors, toughened is standard; laminated is used elsewhere for security/acoustics. See tempered glass for strength basics.

Still seeing drips? The issue may be alignment, hinge set-out, or tray fall — ask Glass Helper for a quick check.

Tips

Tempered vs Laminated Glass: Which Safety Glass Do You Need?

Sep 18, 2025

Safety Glass • Buyer’s Guide

Tempered vs Laminated Glass: Which Safety Glass Do You Need?

Both tempered and laminated glass count as “safety glazing,” but they behave differently in real-world use. This guide explains how each type is made, how it breaks, where it’s used, and the standards that prove performance—so you can specify the right option with confidence.

What counts as safety glass?

In the UK, glazing in “critical locations” (doors, side panels near doors, low-level areas, bathrooms, stairs and barriers) must be safety glass or otherwise protected, as set out in Approved Document K. Impact performance is classified by BS EN 12600, while product-specific standards include BS EN 12150 for tempered (toughened) glass and BS EN 14449 for laminated glass.

Tempered (Toughened) Glass — strength & “granular” breakage

How it’s made: standard float glass is heated and rapidly cooled, creating surface compression that makes it several times stronger than annealed glass of the same thickness.

How it breaks: when failure occurs, tempered glass disintegrates into many small, relatively blunt granules—reducing the risk of laceration. This characteristic is part of the impact safety classification under BS EN 12600.

Typical uses

  • Shower screens and bath enclosures
  • Doors and side panels near doors
  • Low-level glazing (below 800 mm)
  • Furniture tops, shelves and protectors

For buying options and specs, see the tempered glass page.

Advantages

  • High strength for its thickness; cost-effective and widely available
  • Safer break pattern (small granules)
  • Short lead times in common thicknesses (6–10 mm)

Limitations

  • Once tempered, it cannot be cut or processed further
  • Post-breakage there is no residual barrier—granules fall away
  • Can be sensitive to edge damage or hard impacts at fixings

Laminated Glass — layered safety & post-breakage containment

How it’s made: two or more glass sheets are bonded with a polymer interlayer (e.g., PVB, EVA, or ionoplast). The interlayer holds fragments in place if the glass cracks, maintaining a barrier.

How it breaks: you’ll see crack patterns, but pieces adhere to the interlayer—this is crucial where falling hazards exist or where glass overhead must remain intact until replaced. Laminated safety glass is covered by BS EN 14449 and classified to BS EN 12600.

Typical uses

  • Balustrades and guarding (often combined with toughening)
  • Overhead glazing and canopies
  • Shopfronts and security-oriented façade work
  • Acoustic or UV-filtering requirements (special interlayers)

Advantages

  • Remains in place after breakage, preserving a barrier
  • Accepts specialty interlayers (acoustic, stiff ionoplast, tinted)
  • Often preferred by designers for frameless balustrades

Limitations

  • Heavier and generally more expensive than single-ply tempered
  • Edges and interlayer need careful detailing to avoid moisture ingress
  • Longer lead times in custom make-ups

Quick comparison

Property Tempered (toughened) Laminated
Standards BS EN 12150 • Classified to BS EN 12600 BS EN 14449 • Classified to BS EN 12600
Break behaviour Disintegrates into small granules Cracks but fragments adhere to interlayer
Post-breakage safety No residual barrier Remains in place, maintains guarding
Typical thickness for interiors 6–10 mm common Two plies (e.g., 8.8, 10.8, 12.8 mm etc.)
Best for Showers, doors, low-level glazing, furniture Balustrades, overhead glazing, shopfronts, acoustic
Cost & lead time Usually lower cost; fast in stock sizes Higher cost; made-to-order

How to choose: three quick scenarios

1) Bathroom & wet areas

Tempered glass is the go-to for shower screens and bath enclosures because it’s strong, economical, and breaks into small granules. Check that the product is marked to BS EN 12150 and classified under BS EN 12600.

2) Balconies, landings & stair guards

Where glass acts as a barrier against falling, laminated glass is typically required so that a broken pane still provides containment. Designs should also meet height and load rules in BS 6180.

3) Furniture & table tops

For freestanding protectors or tops, tempered glass offers strength and a safe break pattern. Thickness depends on size and support; see general guidance in the table above and product details on the tempered glass page.

Handrails & “no-rail” designs

BS 6180 includes cases where a continuous handrail is required for barriers protecting drops, but allows exceptions when laminated toughened glass is used and remains in place after breakage. Always confirm the specific system’s test data and fixing details before choosing a rail-free design.

Care, marks & identification

  • Look for permanent stamps / declarations of conformity to the relevant standards.
  • Avoid abrasive cleaners; use microfibre cloths and non-ammonia sprays.
  • For external laminates, discuss edge detailing and interlayer choice to reduce moisture ingress and maintain clarity over time.

Standards and guidance evolve—always check the current documents and consult Building Control for installations in critical locations.

FAQs

Is laminated glass stronger than tempered glass?

They’re strong in different ways. Tempered glass provides high impact strength for its thickness; laminated glass adds post-breakage containment thanks to the interlayer. For barriers and overhead, laminated (often with toughened plies) is preferred because it stays in place if damaged.

Which one is safer?

Both are “safety glass.” Tempered breaks into small granules; laminated stays intact after cracking. The safer choice depends on location: for fall protection or overhead, laminated is usually specified; for showers and furniture, tempered is common.

Can I cut tempered glass at home?

No. Tempered glass cannot be cut or drilled after toughening. All processing must be done before heat treatment.

Does laminated glass block UV or reduce noise?

Many interlayers filter UV significantly, and acoustic interlayers can reduce sound transmission. Ask for performance data for the specific laminate build-up.


References: Approved Document KBS EN 12600BS EN 12150BS EN 14449.